
If you’re using a Mac computer for business you’ve likely had situations which required the use of Windows only program or application. In fact, I use Windows nearly everyday for data ETL projects (Infogix Data360). For over a decade now I’ve used VMware Fusion to run a virtual computer with the Windows operating system (OS).
This has proved very helpful too when testing or upgrading. For example, before I made the switch from Windows 7 (incidentally no longer supported by Microsoft) to Windows 10 I duplicated my VM (i.e. virtual machine or computer). Then I upgraded that duplicate copy and ran it for several weeks to make sure I would not be faced with any bugs or other issues when making the transition.
I recently decided I wanted to do the same thing for macOS. Mostly I want to have a VM running macOS so I can test updates to Xcode, Angular, Cordova, etc without risking any of my current projects or apps.
This journey was nearly as simple as it should have been. So I’ve decided to share my experience and hopefully it helps you.
My Environment
- macOS Catalina version 10.15.5
- VMware Fusion version 11.5.5
Applications & Files Needed
- VMware Fusion (of course).
- A macOS Catalina iso file. You can download one here.
Create macOS VM
1. Open VMware Fusion and select the option to create a New computer.

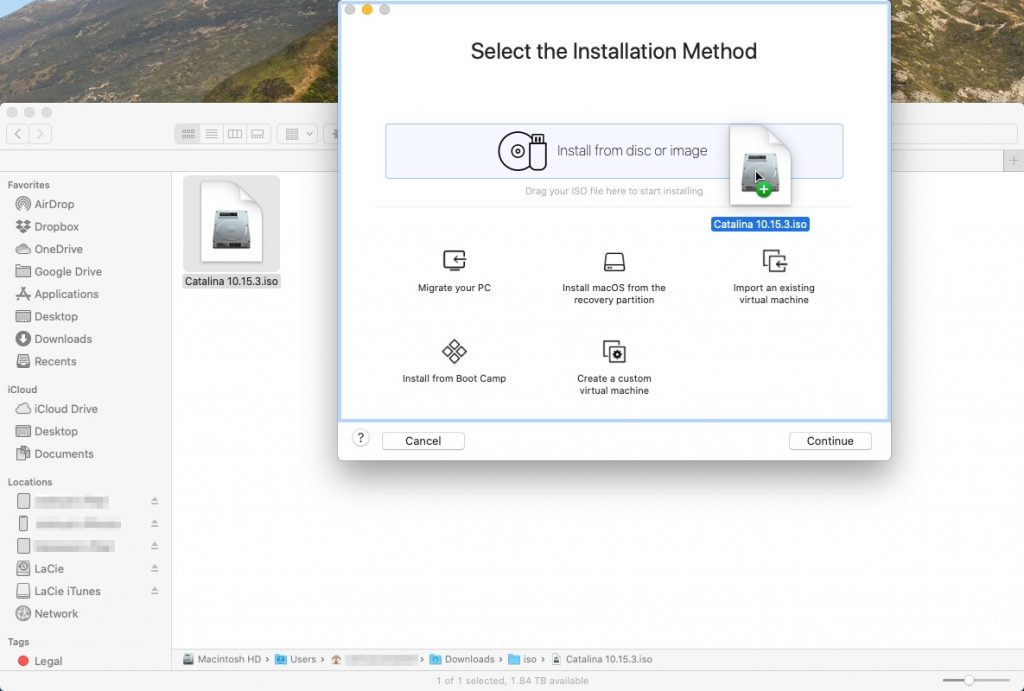
2. Drag the ISO file your downloaded above to the first option in the “Select the Installation Method” window.
3. Select the operating system you’re installing. In this case first select “Apple OS X” and then choose “macOS 10.15”. Then click on “Continue”.

4. Now you’re ready to install. Just click on “Continue” and select all of the defaults. Soon you’ll have a VM running macOS 10.15.5 (Catalina).